

Watch Face Studio offers a range of interactive features to elevate the design of watch faces for Galaxy Watch running Wear OS powered by Samsung. The gyroscope is a particularly powerful tool, which enables the watch faces to react dynamically to wrist motions. By leveraging gyroscope-based interactions, designers can create immersive experiences that go beyond static watch faces.
The article discusses two creative use cases for the gyroscope in a watch face. First, we change the scene when the user raises or lowers their hand. Second, we try to implement a 3D like effect using only 2D assets, which is known as the parallax effect.
These use cases show how Watch Face Studio makes it easy to implement gyroscope-driven features without requiring advanced coding skills. You can download Watch Face Studio from here. Now let’s get started.
NotePlease ensure that your device is equipped with SDK version 34 or higher to run the project smoothly.
Changing the Watch Face Based on Wrist Motion
To follow along, download the sunset sample project. This project aims to demonstrate how different properties can be changed based on wrist movement and rotation. Our goal is to create a dynamic scene where raising the wrist transitions into a daytime scene, and lowering it reverts the screen to a nighttime scene. You can start by following these steps:
NoteWe only apply gyro effects to the X-AXIS. When the user raises or lowers their hand, they rotate the watch along its x-axis.
- Open the downloaded project and from the layers list, hold Ctrl/Command and click on “Sun,” “CloudLeft,” “CloudRight,” “DaySky,” “PalmTreeShadow” and “DayWater” to select these components.
Figure 1: Select elements
- In the Properties tab, from the GYRO section, click on “Apply Gyro.” In the X-AXIS section, set the range from -45 to 45 degrees. It is half of the total range, so the user only needs to tilt their wrist 45 degrees in any direction to see the effect.
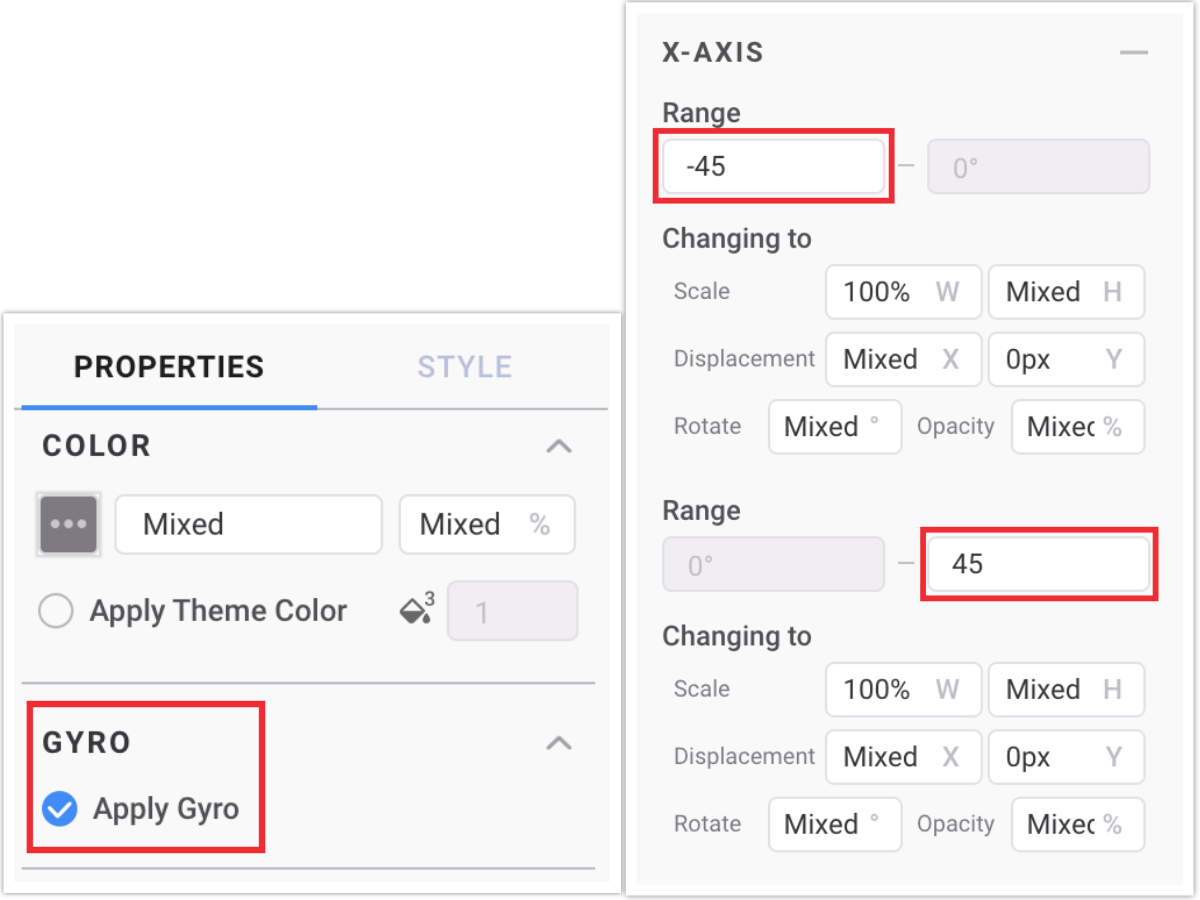
Figure 2: Apply Gyro and Set Range
- Now select “DaySky” and “DayWater.” Set the opacity to 0% for both directions on the X-AXIS. Since “NightSky” and “NightWater” are layers right below “DaySky” and “DayWater,” lowering the opacity of the day elements slowly reveals the night elements.
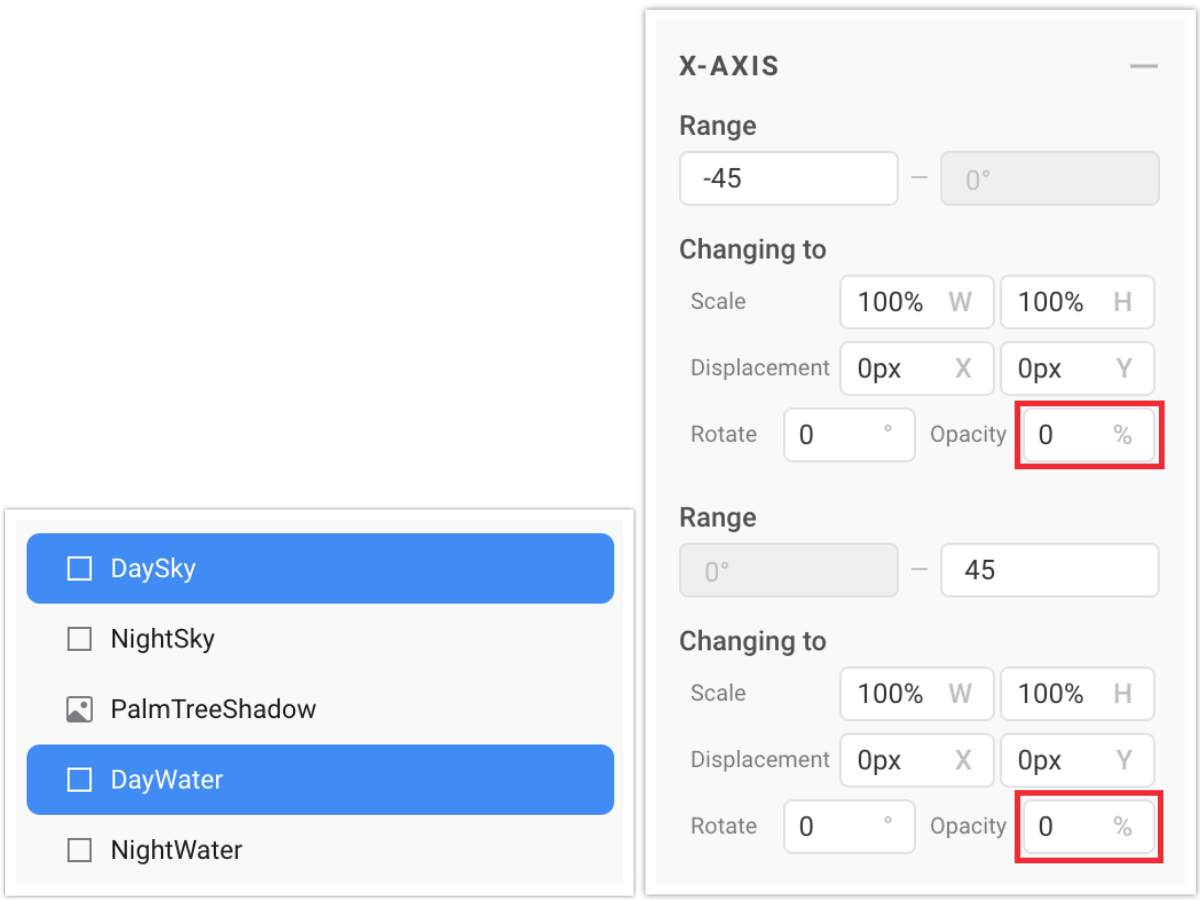
Figure 3: Set Opacity
- Select “CloudLeft” and in the X-AXIS section, set the displacement of X to -250px for both directions.
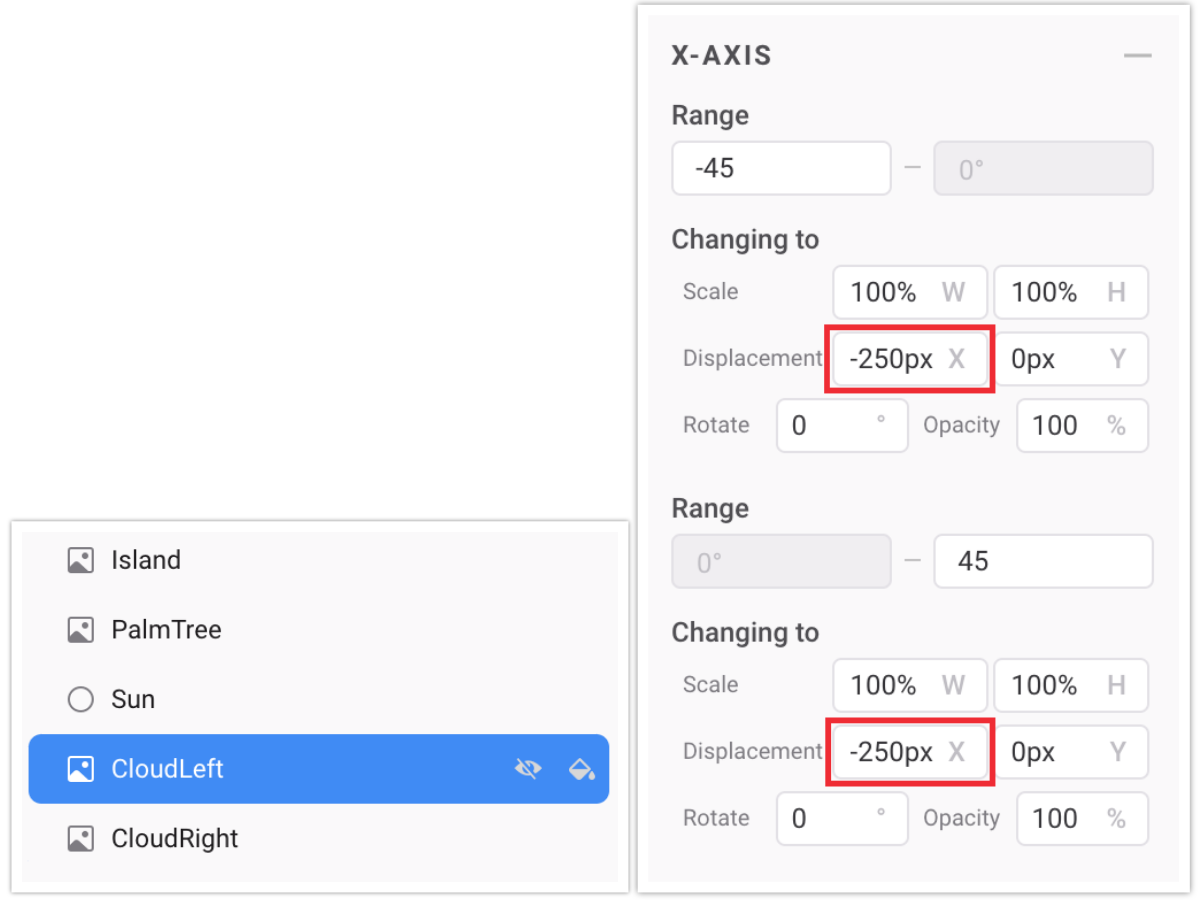
Figure 4: Set Displacement for the first cloud
- For “CloudRight,” the displacement should be 250px for both directions.

Figure 5: Set Displacement for the second cloud
- From the layers list, select “Sun” and drag the sun’s pivot to the center of the watch face, which is (225, 225). This makes it look like the sun is going along the edges of the watch.
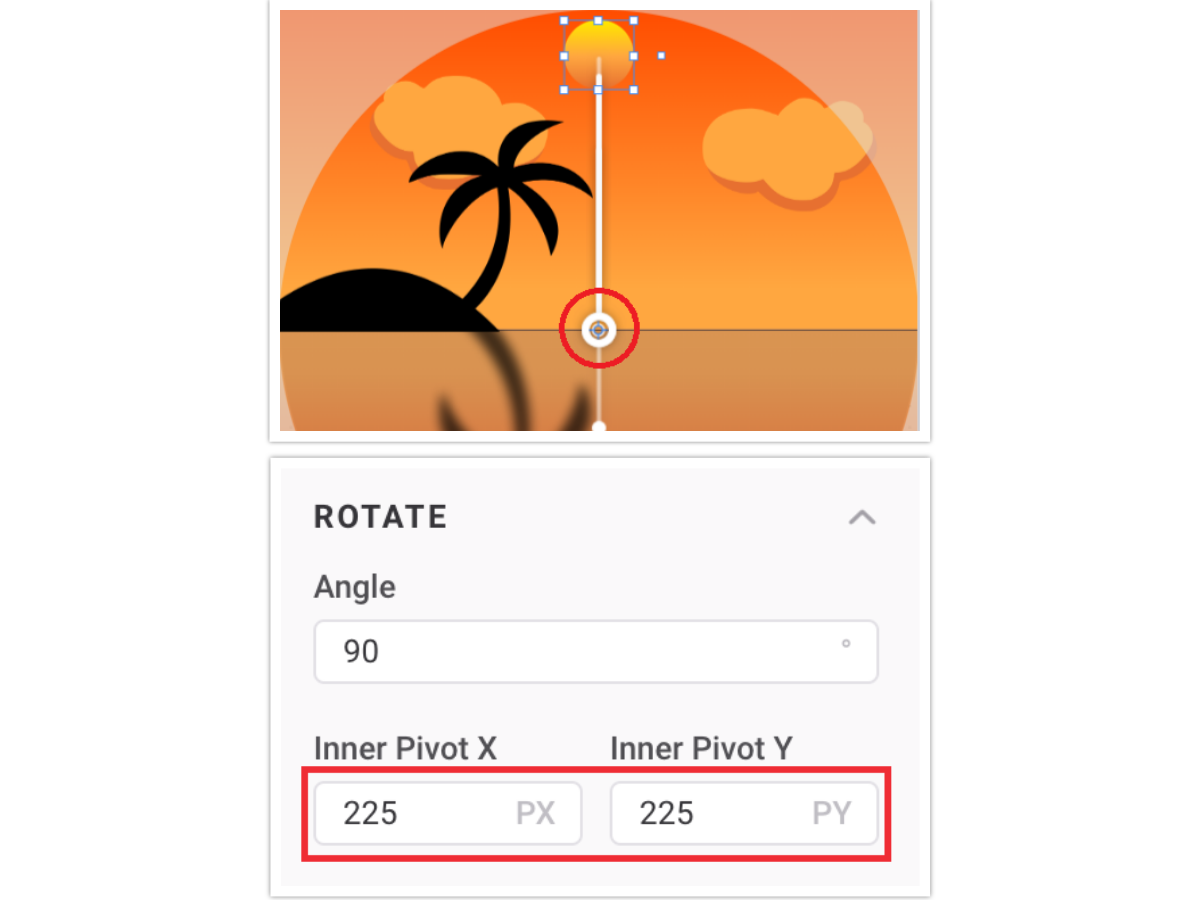
Figure 6: Change Pivot
- Select “Sun” and “PalmTreeShadow” and in the X-AXIS section, set the opacity to 0% for both directions. Set negative rotation to -70 degrees and positive rotation to 70 degrees.
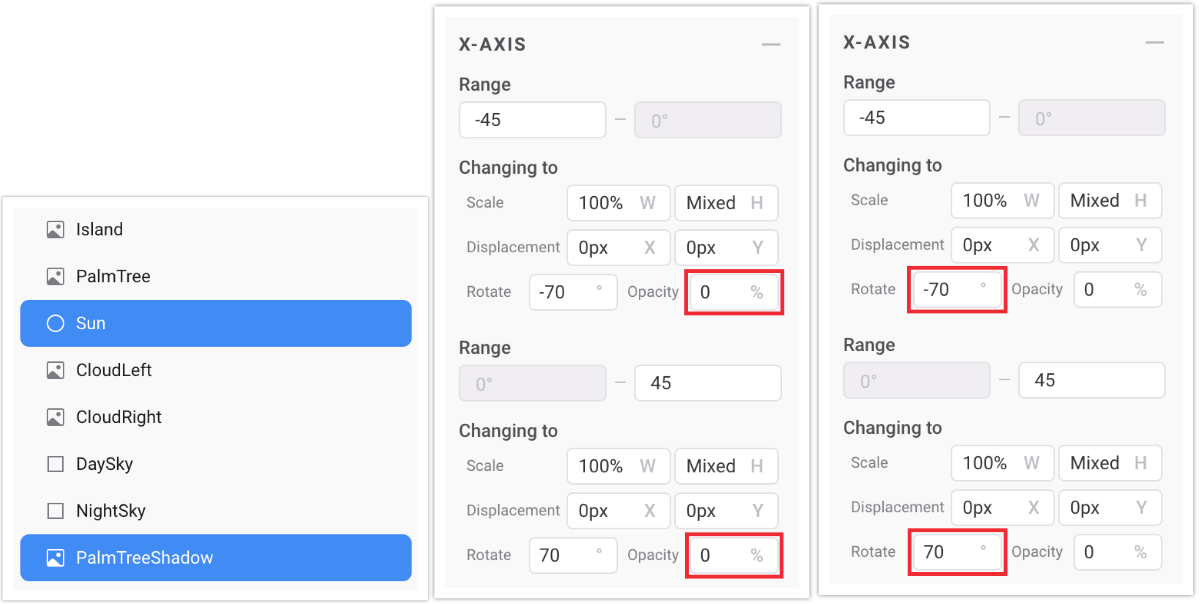
Figure 7: Set Rotation and Opacity
- Select “PalmTreeShadow” and drag the pivot to its root, set scale to 180% for negative rotation on the X-AXIS and to 130% for positive rotation. Since the tree is slightly to the left, we stretch the shadow more when it falls on the right side.

Figure 8: Set Scale
- Here is a preview of the watch face we just created:
Figure 9: Preview of the first watch face
3D Parallax Effect Using 2D Images
The parallax effect is a visual technique that creates the illusion of depth and motion by moving elements at different speeds. The closer the object is to the subject, the more it will move. We can follow this rule to create a watch face in the Watch Face Studio. Now let’s build another one:
- Open the parallax sample project and from the layers list, select all the trees inside the “Trees” group, “mountain front” and “mountain back.” In the GYRO section from the PROPERTIES tab, click on “Apply Gyro.”
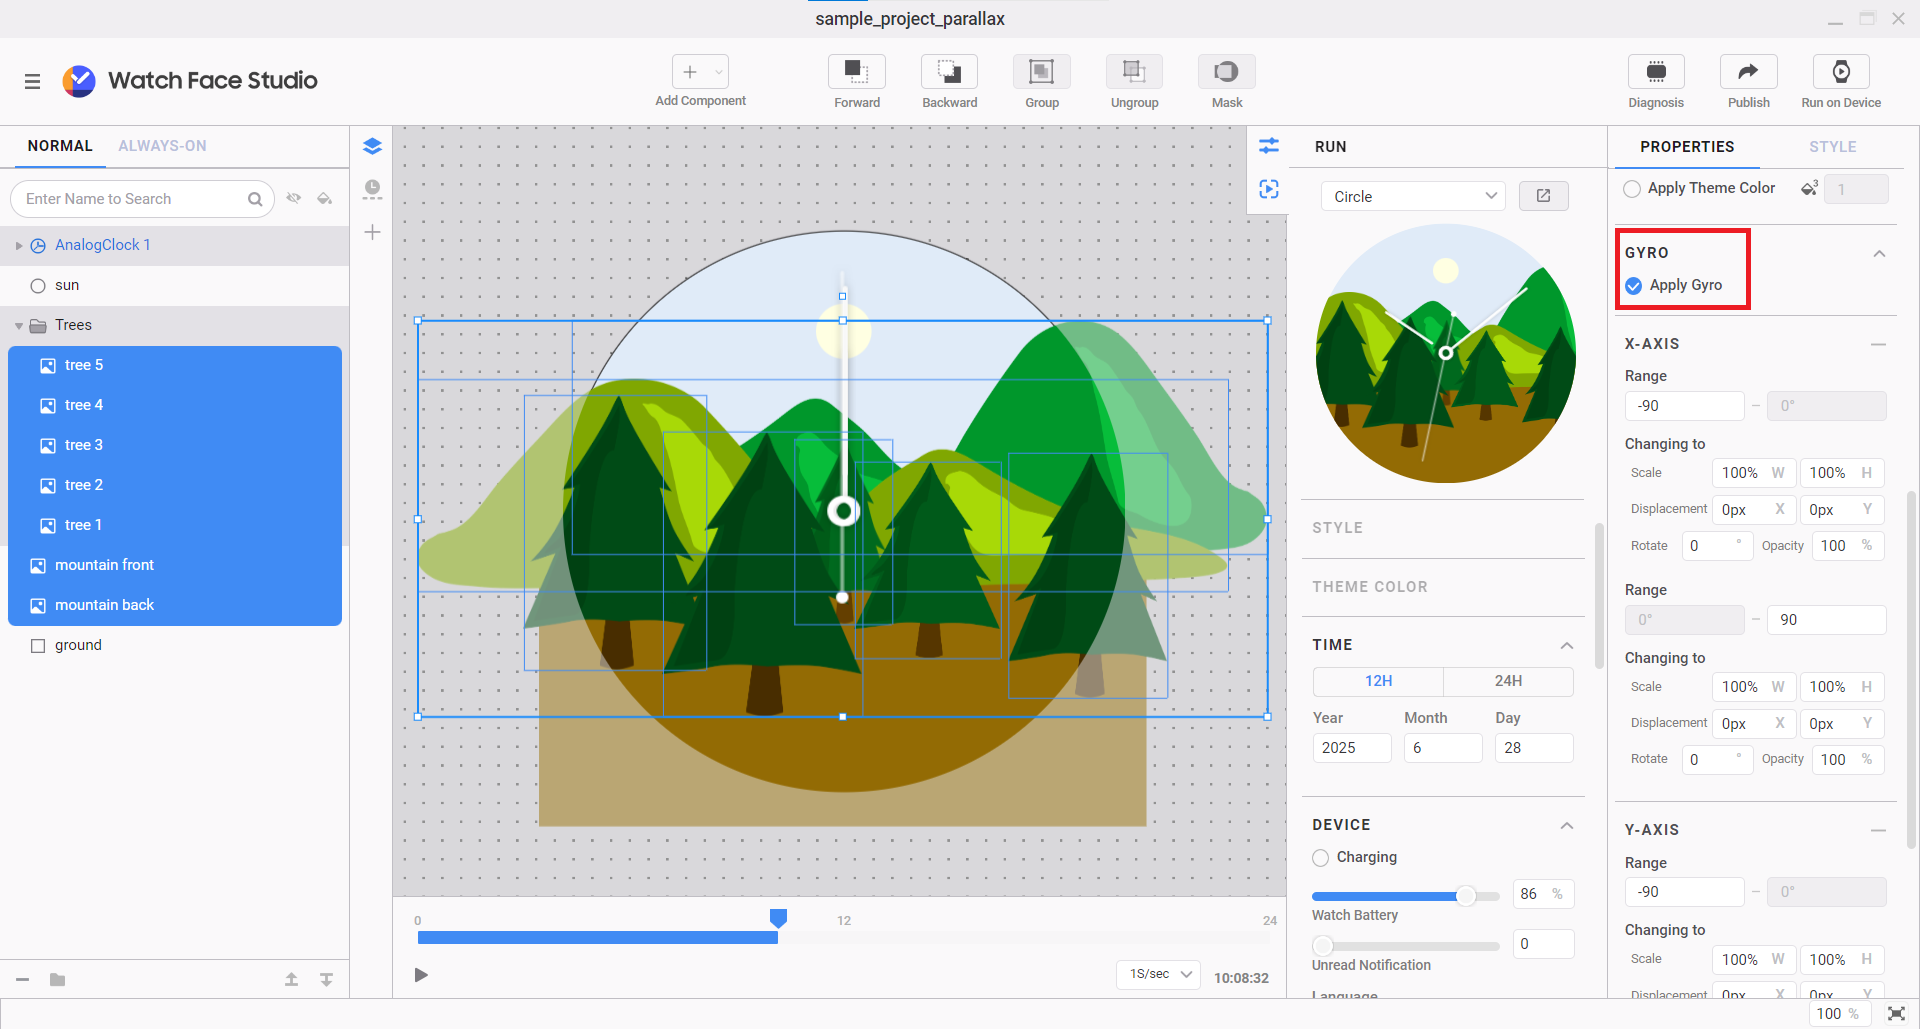
Figure 10: Select Elements and Apply Gyro
NoteYou have to select each component individually inside the group instead of selecting the group itself.
- In the X-AXIS and Y-AXIS sections, set the range from -45 to 45 degrees.
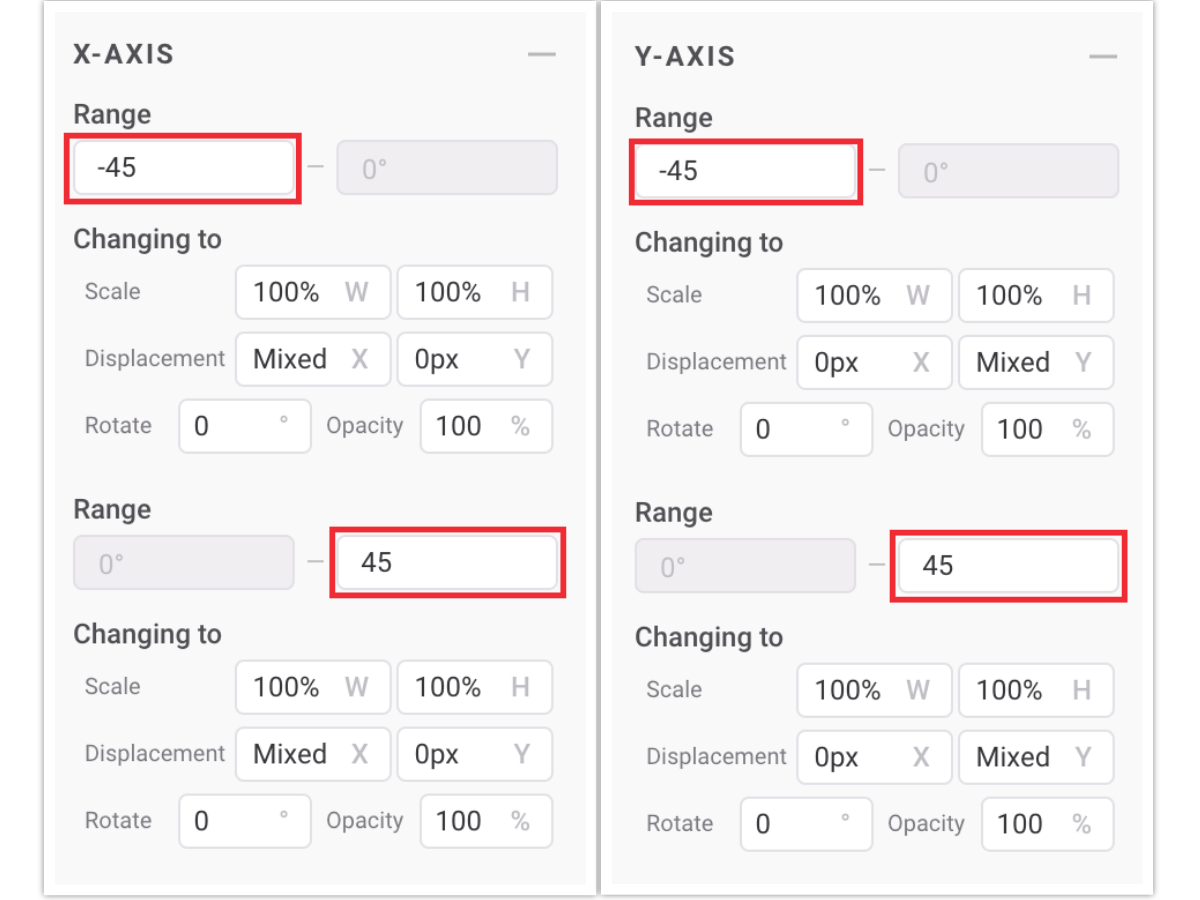
Figure 11: Set Range
- Now only select the trees inside the “Trees” group. Go to the X-AXIS section and apply a displacement of 60px to X for negative rotation and -60px for positive rotation. Go to the Y-AXIS section and apply a displacement of -60px to Y for negative rotation and 60px for positive rotation.
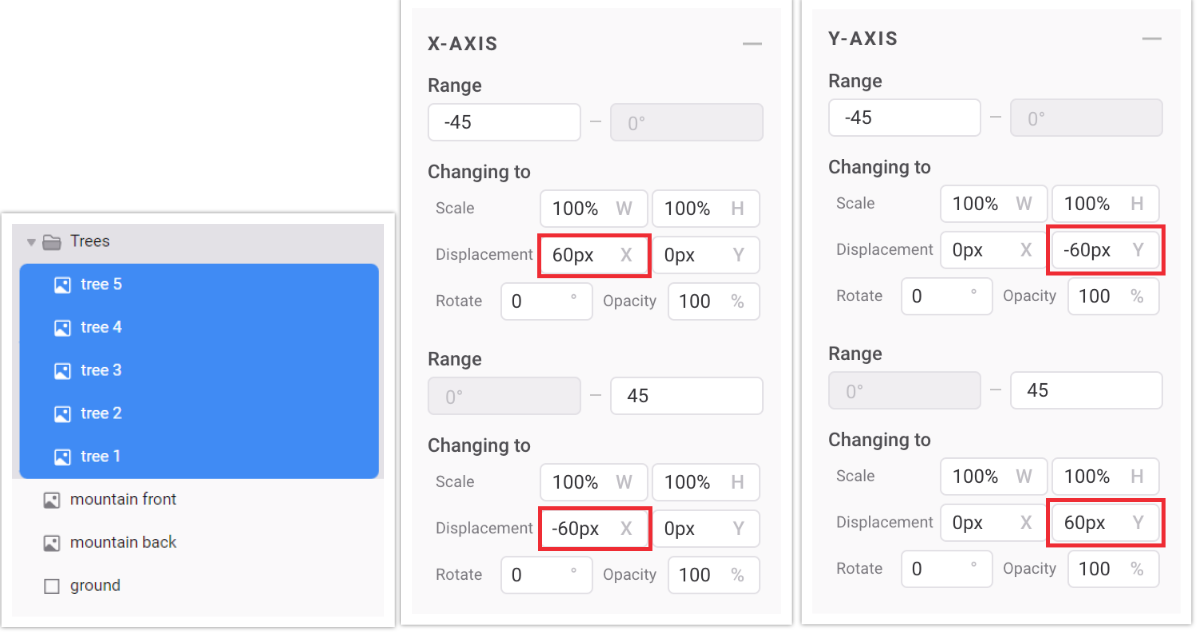
Figure 12: Set Displacement for the first element
- From the layers list, select “mountain front.” This must move less than the trees since it is behind them. Now repeat step 3 for “mountain front” but this time, on the X-AXIS, set negative rotation to 40px and positive rotation to -40px. For the Y-AXIS, set the negative rotation to -40px and the positive rotation to 40px.
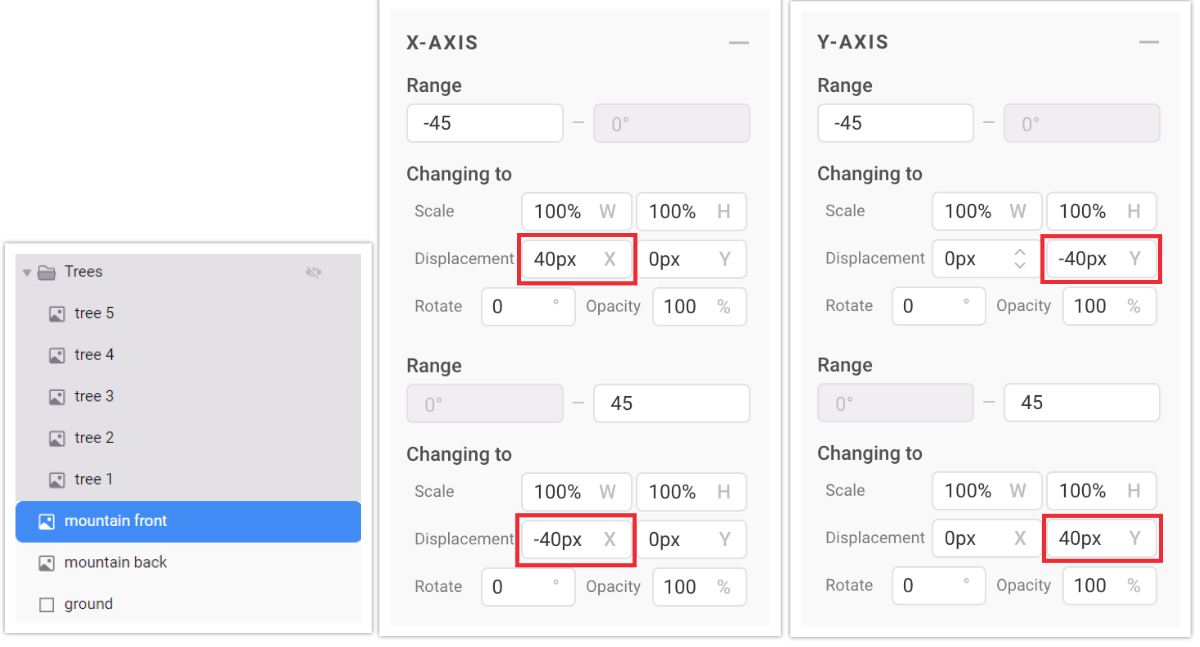
Figure 13: Set Displacement for the second element
- Select “mountain back” and repeat step 3. This time, on the X-AXIS, set 20px as the negative rotation and -20px as the positive rotation. For the Y-AXIS, set -20px as the negative rotation and 20px as the positive rotation.
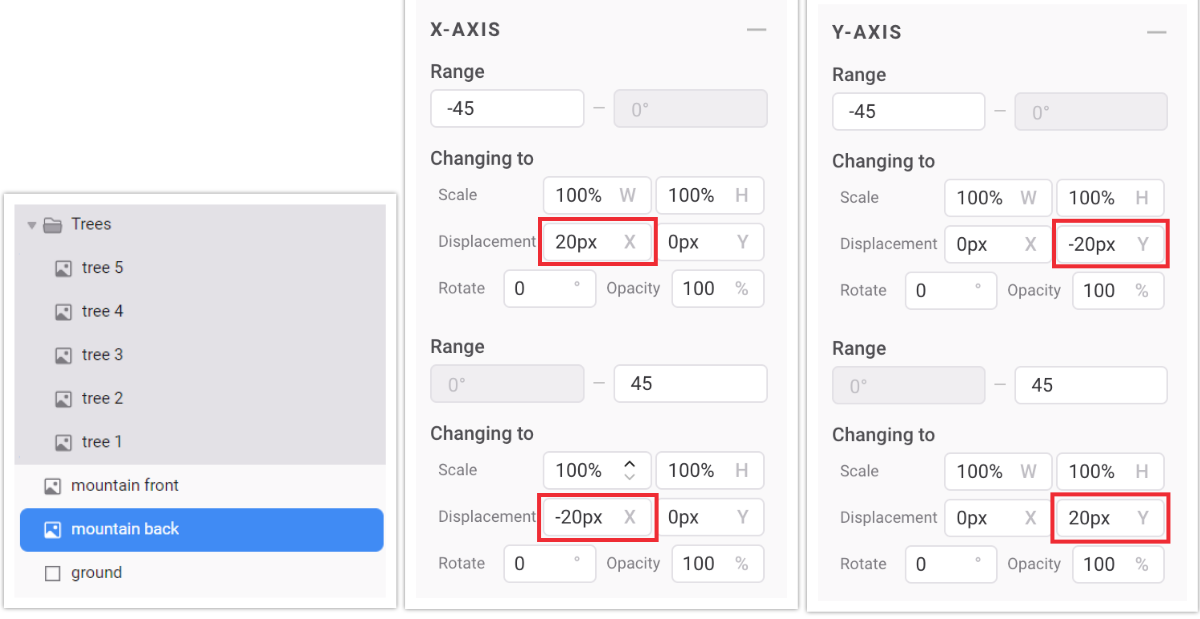
Figure 14: Set Displacement for the third element
- The final watch face looks like this:
Figure 15: Preview of the second watch face
You can add as many layers as you want. However, consider performance and battery consumption before adding a high number of layers. You may download the final projects from here:
Performance Considerations
When designing gyroscope-based watch faces, it is important to balance responsiveness with performance efficiency:
Battery Consumption: Excessive movement calculations may affect battery life. Try to minimize unnecessary computations to reduce battery usage.
Smoothness & Processing Power: Lagging can hinder user experience. Test the interactions on real devices to ensure smooth performance.
User Comfort: Ensure that motion effects enhance usability rather than causing distraction or discomfort.
Summary
Gyroscope-based interactions add an exciting dimension to watch face design, enabling dynamic animations, realistic depth effects, and improved usability. Watch Face Studio makes it easy to incorporate these features, allowing designers to create engaging and interactive experiences for Wear OS users.
If you have questions or need help with the information presented in this blog, you can share your queries on the Samsung Developers Forum. You can also contact us directly for specialized support through the Samsung Developer Support Portal.
