On Galaxy Watch, Complications are small bits of useful information other than time, such as battery level, calendar events, or step count. These details are displayed in predefined areas called Complication Slots. You can set up different Complication Slots on your watch face using Watch Face Studio to customize the kind of information you want to display. The actual data used to populate these slots comes from other applications, known as Complication Data Sources.
In this blog, we’ll explore building a Complication Data Source that allows your application to seamlessly share information with any compatible watch face on your Galaxy Watch running Wear OS powered by Samsung. Whether it is weather forecast, battery status or custom application stats, you’ll learn how to deliver that data in a way that watch faces can easily access and display.
Prerequisite
- Install the latest version of Android Studio.
- Download the starting project: starting_project_complication.zip
- Set up an emulator or connect your Galaxy Watch to your PC using Wireless Debugging.
NoteThis blog requires you to have a basic understanding of native Android application development in Java or Kotlin.
Run the starting project once to make sure everything is working as expected. This installs a sample application named Hydration Tracker. With it, you can log how many glasses of water you have had during the day and set a daily goal to stay on track. You will use this simple application to explore how you can share your data with a watch face. The project already includes all the required dependencies and core application logic, so you can jump straight into working on the data-sharing aspect.
Figure 1: Sample application screenshot
All the required data is stored in SharedPreferences as key-value pairs, which makes it easy to retrieve when building the Complication Data Source. Alternatively, you can use Jetpack DataStore if you prefer a more modern and scalable solution for managing application data.
Implement Complication Data Source Service
The complication needs data even when your application is not running. The way we do that is by implementing a Service that provides the data to the complication.
- Extract the starting project and open the starting_project_complication folder in Android Studio.
- Right-click on the java directory and add a new package named com.example.customcomplication.complication.
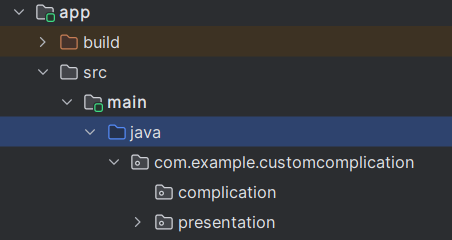
Figure 2: Package structure
- Right-click on the complication package and select New > Kotlin Class/File. Name the class something like HydrationComplicationService.
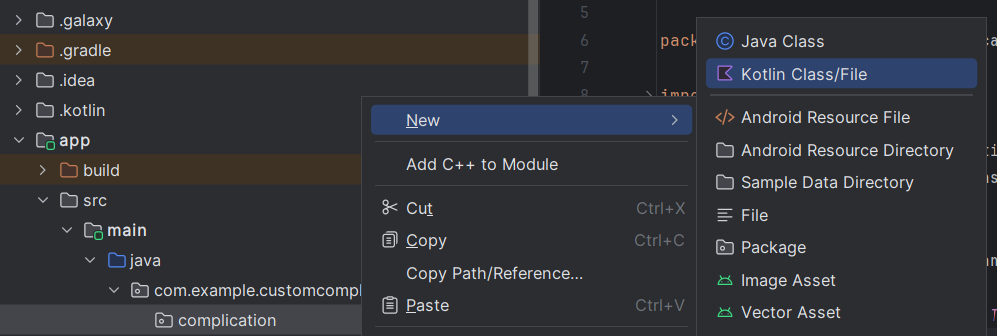
Figure 3: Creating the service class
- Extend that class with SuspendingComplicationDataSourceService(). Hover the cursor over it and import the class.

Figure 4: Extending the service class
- Now implement all the members in the HydrationComplicationService class.
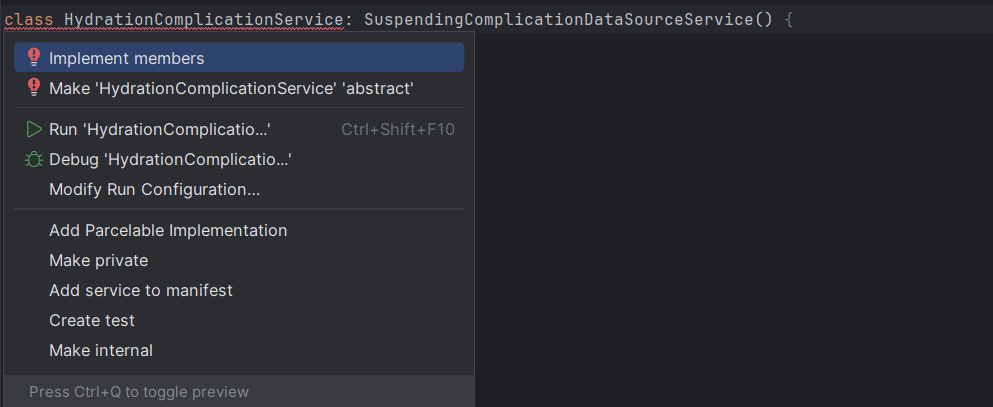
Figure 5: Implementing members of the service class
Afterwards, the class should look like this:
class HydrationComplicationService : SuspendingComplicationDataSourceService() {
    override fun getPreviewData(type: ComplicationType): ComplicationData? {
        TODO("Not yet implemented")
    }

    override suspend fun onComplicationRequest(request: ComplicationRequest): ComplicationData? {
        TODO("Not yet implemented")
    }
}
The getPreviewData() method shows predefined data when your complication is loading the values and the onComplicationRequest() method is called whenever a complication data update is requested.
- Below the onComplicationRequest() method, add a createRangedValueComplicationData() method that returns a RangedValueComplicationData object. This method sets the minimum, maximum, and current values of the progress bar shown in the complication and sets the text that is shown.
private fun createRangedValueComplicationData(
    current: Float,
    max: Float,
    text: String,
    contentDescription: String
): ComplicationData {
    return RangedValueComplicationData.Builder(
        value = current,
        min = 0f,
        max = max,
        contentDescription = PlainComplicationText.Builder(contentDescription).build()
    )
        .setText(PlainComplicationText.Builder(text).build())
        .build()
}
NoteIf you notice any class names highlighted in red, make sure to import the necessary classes.
- Next, create a MonochromaticImage inside the method you just created. It is used to set an optional image associated with the complication data.
val monochromaticImage = MonochromaticImage.Builder(
    Icon.createWithResource(this, R.drawable.drinking_water_icon)
).build()
- Create a PendingIntent to launch the MainActivity from the complication when you tap on it.
val pendingIntent = PendingIntent.getActivity(
    this,
    0,
    Intent(this, MainActivity::class.java),
    PendingIntent.FLAG_IMMUTABLE or PendingIntent.FLAG_UPDATE_CURRENT
)
- Now, on the RangedValueComplicationData, set monochromaticImage and tapAction before building it.
return RangedValueComplicationData.Builder(
    value = current,
    min = 0f,
    max = max,
    contentDescription = PlainComplicationText.Builder(contentDescription).build()
)
    .setText(PlainComplicationText.Builder(text).build())
    .setTapAction(pendingIntent)
    .setMonochromaticImage(monochromaticImage)
    .build()
Finally, the method should look like this:
private fun createRangedValueComplicationData(
    current: Float,
    max: Float,
    text: String,
    contentDescription: String
): ComplicationData {
    val monochromaticImage = MonochromaticImage.Builder(
        Icon.createWithResource(this, R.drawable.drinking_water_icon)
    ).build()
    val pendingIntent = PendingIntent.getActivity(
        this,
        0,
        Intent(this, MainActivity::class.java),
        PendingIntent.FLAG_IMMUTABLE or PendingIntent.FLAG_UPDATE_CURRENT
    )

    return RangedValueComplicationData.Builder(
        value = current,
        min = 0f,
        max = max,
        contentDescription = PlainComplicationText.Builder(contentDescription).build()
    )
        .setText(PlainComplicationText.Builder(text).build())
        .setTapAction(pendingIntent)
        .setMonochromaticImage(monochromaticImage)
        .build()
}
- Override the getPreviewData() method and use this new method to return a ComplicationData object.
override fun getPreviewData(type: ComplicationType): ComplicationData? {
    if (type != ComplicationType.RANGED_VALUE) {
        return null
    }
    return createRangedValueComplicationData(
        current = 0f,
        max = 8f,
        text = "0 out of 8",
        contentDescription = "You've had 0 out of 8 glasses of water"
    )
}
- Override the onComplicationRequest() method as well. You are fetching the data from SharedPreferences because the starting project also saved the data in SharedPreferences.
override suspend fun onComplicationRequest(request: ComplicationRequest): ComplicationData {
    val prefs = this.getSharedPreferences("water_prefs", Context.MODE_PRIVATE)

    val glassCount = prefs.getInt("glasses_drank", 0).toFloat()
    val maxGlasses = prefs.getInt("max_glasses", 8).toFloat()

    val text = "${glassCount.toInt()} out of ${maxGlasses.toInt()}"
    val contentDescription =
        "You've had ${glassCount.toInt()} out of ${maxGlasses.toInt()} glasses of water"

    return createRangedValueComplicationData(
        current = glassCount,
        max = maxGlasses,
        text = text,
        contentDescription = contentDescription
    )
}
Register the Service
To let the system know that your service exists, you need to register it in the Manifest file. Here, BIND_COMPLICATION_PROVIDER is necessary to ensure only the Wear OS system can bind to your service. To learn more, refer to Manifest declarations and permissions.
- In the AndroidManifest.xml file, register the service by adding the
tag inside the tag:
- Inside the
tag, add the tag. This lets the system know that your service is built on either ComplicationDataSourceService or the SuspendingComplicationDataSourceService, and is capable of providing data for watch face complications.
- Add the
tag to specify the type of complication your service supports. In our case, it is set to RANGED_VALUE.
- Include another
tag, which defines how frequently the system should request updates from your data source while it is active. Since you will be updating manually, the value is set to zero.
Update the Data on Demand
You can now install the complication and see how it works. However, the complication does not yet update each time we change the data. To make sure the complication is always showing up-to-date data:
- Create a method below the MainActivity, named requestComplicationUpdate().
private fun requestComplicationUpdate(context: Context) {
    val component = ComponentName(context, HydrationComplicationService::class.java)
    ComplicationDataSourceUpdateRequester
        .create(context, component)
        .requestUpdateAll()
}
- Call the requestComplicationUpdate() method from the updateCount() and updateMaxGlasses() methods in the MainActivity.
fun updateCount(newCount: Int) {
    glassCount = newCount
    prefs.edit() { putInt(countKey, newCount) }
    requestComplicationUpdate(context)
}

fun updateMaxGlasses(newMax: Int) {
    maxGlasses = newMax
    prefs.edit() { putInt(maxKey, newMax) }
    if (glassCount > newMax) updateCount(newMax)
    requestComplicationUpdate(context)
}
NoteHere, the updateCount() method updates how many glasses of water you have had. The updateMaxGlasses() method updates your goal.
Your project is now complete! If you run into any issues, feel free to check out the completed version for reference:
completed_project_complication.zip
Test the Complication
- Tap and hold the watch face you currently have. Tap Customize.
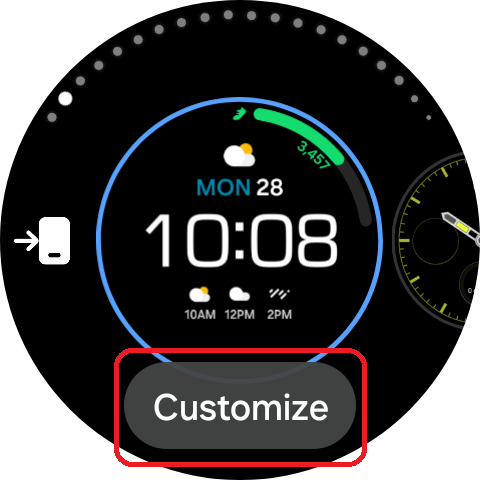
Figure 6: Customize the watch face
- Now swipe to the option that says Complication. Choose a slot that supports a ranged value.
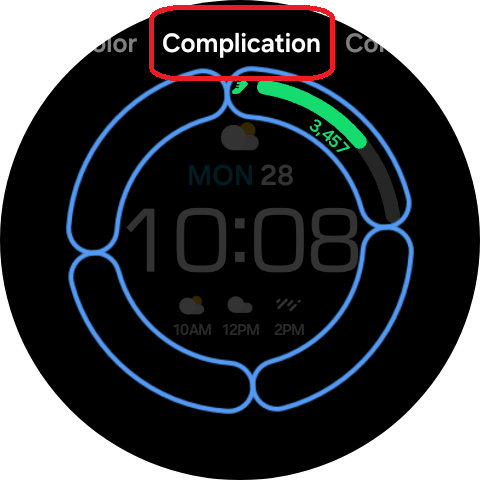
Figure 7: Swipe to Complication
- You see a list of applications that can provide data to that slot. Scroll down to see the complication you just created, named Hydration Tracker Complication, and select it.
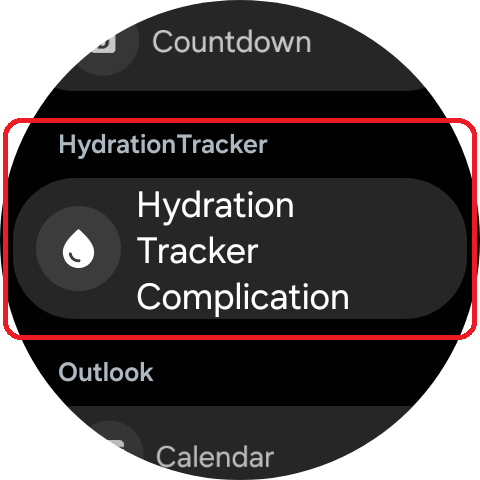
Figure 8: Choose the complication
- Swipe back to the watch face to see your complication in action.
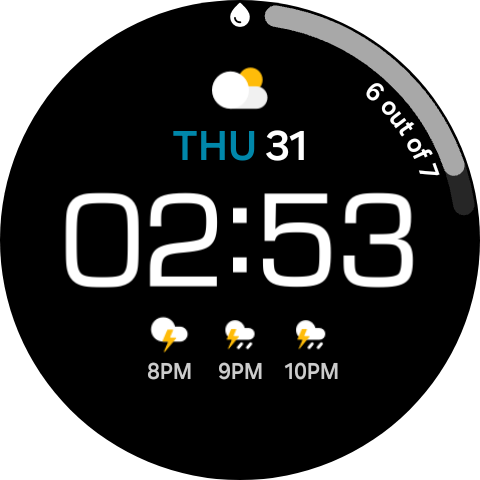
Figure 9: Preview
NoteThe watch face must have a Complication Slot that supports ranged values. If your current watch face does not have one, apply a watch face that does and start from step 1.
Conclusion
Now that you’ve mastered the basics, don’t stop there! Explore different complication types, experiment with dynamic updates, and get creative with the kind of data your application can provide. The possibilities are wide open, and your next great idea might be just one complication away.
If you have questions or need help with the information presented in this blog, you can share your queries on the Samsung Developers Forum. You can also contact us directly through the Samsung Developer Support Portal.


