

In the ever-changing world of software development, having the right tools at your fingertips is crucial. One such essential tool is Microsoft’s Visual Studio, a powerful Integrated Development Environment (IDE) that has been a staple for developers across the globe. In this comprehensive guide, we’ll walk you through the step-by-step process of installing Visual Studio 2026 on your Windows 11 system that ensures you have the latest and greatest tools at your disposal.
Explore More: How to install PHP 8.4.3 on Windows 11?
Benefits of Visual Studio 2026
Visual Studio has long been the preferred IDE for .NET developers, which offers a seamless and integrated experience for building a wide range of applications from desktop programs to mobile apps and web services. With the release of Visual Studio 2026, Microsoft has introduced a host of new features and enhancements that make it an even more powerful and versatile tool for developers.
Some of the key highlights of Visual Studio 2026 include:
- Improved Performance and Efficiency: The latest version of Visual Studio boasts faster build times, quicker code navigation, and more responsive debugging that allows developers to work more efficiently and productively.
- Enhanced Debugging Tools: Visual Studio 2026 offers advanced debugging capabilities, which includes improved breakpoint management, better support for parallel debugging, and more intuitive visualizations of complex data structures.
- Seamless Cloud Integration: Through its strong integration with Microsoft Azure, developers can easily deploy and manage their applications in the cloud, which streamlines the development and deployment process.
- Expanded Language Support: In addition to C# and VB.NET, Visual Studio 2026 provides improved support for a variety of programming languages, which includes Python, JavaScript, and TypeScript that makes it a more versatile tool for cross-language development.
- Improved Collaboration Features: Visual Studio 2026 enhances the collaborative experience with features like real-time code editing, integrated version control and seamless integration with tools like GitHub and Azure DevOps.
Whether you’re an experienced .NET developer or just starting your journey in the world of software development, Visual Studio 2026 is a powerful tool that can help you create amazing applications more efficiently and effectively.
Install Visual Studio 2026 on Windows 11
Now that we’ve covered the key features and benefits of Visual Studio 2026, let’s dive into the installation process. Follow these steps to get Visual Studio 2026 up and running on your Windows 11 system:
Step 1: Download Visual Studio 2026
To begin, head over to the official Visual Studio website. Click on the “Download Community” button to initiate the download of the Visual Studio 2026 Community edition, which is the free version of the IDE. This version provides a comprehensive set of tools and features, which makes it an excellent choice for individual developers, students, and small teams.
Step 2: Run the Installation
Once the download is complete, locate the .exe file and right-click on it, then select “Open” to begin the installation process. This will launch the Visual Studio Installer, which will guide you through the rest of the setup.
In the installer, you’ll be presented with several options to customize your installation. For now, let’s keep the default settings and proceed with the installation.
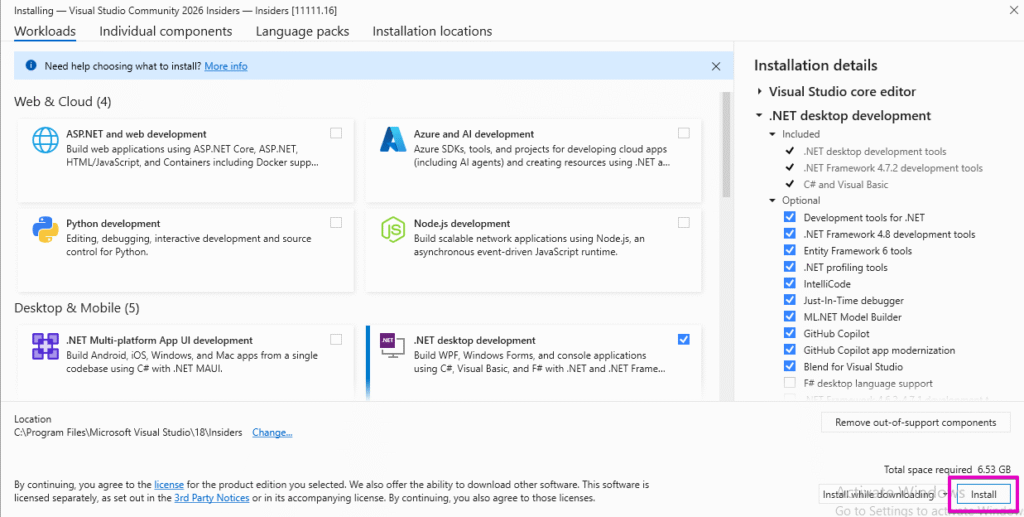
Step 3: Select Workloads
The next step is to select the workloads, or the specific components and features, that you want to install. For this example, we’ll choose the “.NET desktop development” workload, which will install the necessary tools and frameworks for building desktop applications using the .NET Framework.
Feel free to explore the other available workloads, such as “Web & Cloud” or “Data science and analytical applications,” if you have specific needs or interests in those areas. Once you’ve made your selections, click “Install” to begin the installation process.
Step 4: Wait for the Installation to Complete
The installation process may take some time, as Visual Studio 2026 is a large and feature-rich application. During this time, the installer will download and install the selected components, so be patient and let the process run its course. Once the installation is complete, you’ll see Visual Studio 2026 will automatically launch.
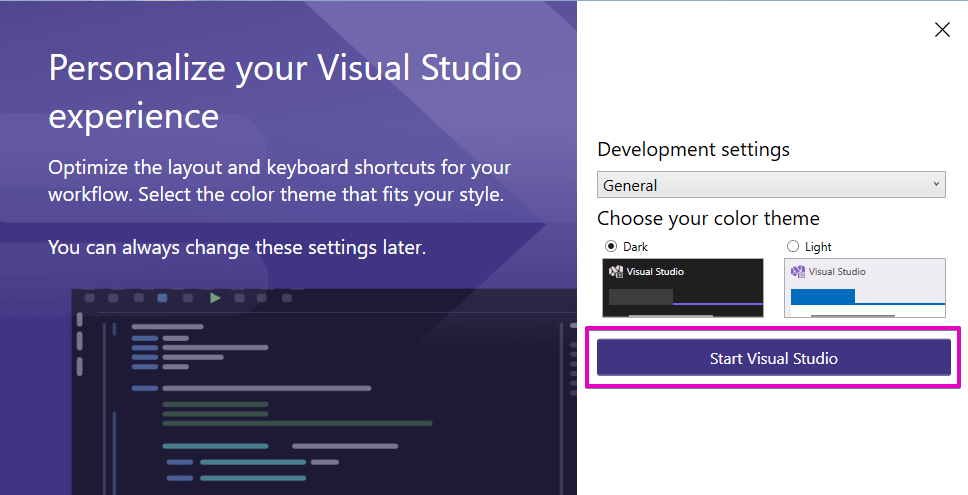
Step 5: Customize Your Visual Studio Experience
When Visual Studio 2026 opens for the first time, you’ll be prompted to choose your development settings. For this example, we’ll select the “General” settings, which provide a balanced and familiar experience for most developers.
You’ll also be asked to choose a color theme for the IDE. Feel free to experiment with the different options to find the one that best suits your preferences and working style.
After making your selections, click “Start Visual Studio” to begin your journey with the latest version of this powerful development tool.
Create a Sample C# Console Application
Now that you have Visual Studio 2026 installed and ready to go, let’s dive in and create a simple C# console application to get a feel for the development experience.
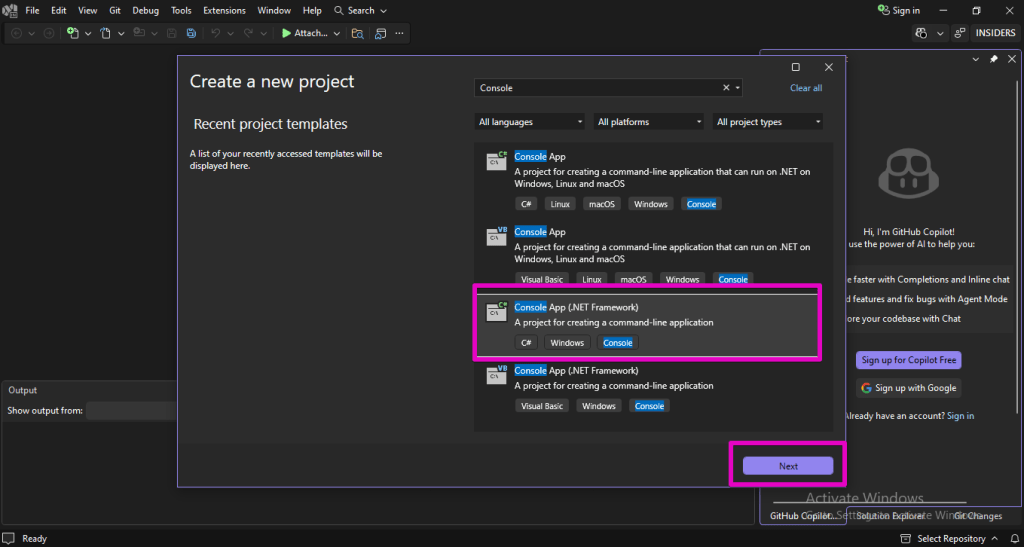
Step 1: Create a New Project
In the Visual Studio 2026 IDE, click on the “File” menu and select “New” > “Project.” This will open the “Create a new project” window, where you can choose the type of project you want to create.
In the search bar, type “console” to filter the available project templates, and then select the “Console App (.NET Framework)” template. Click “Next” to proceed.
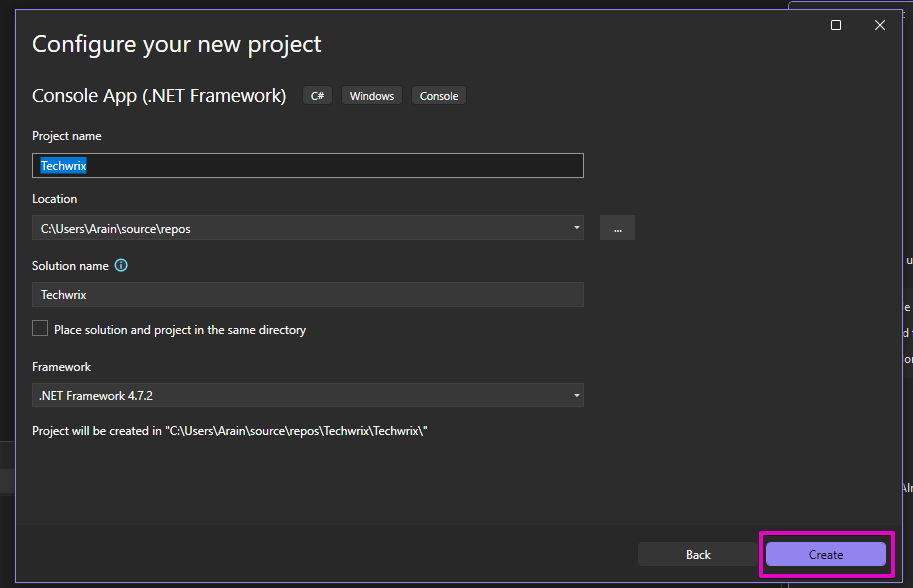
Step 2: Configure the Project
On the next screen, you’ll be asked to provide a name for your project. For this example, let’s name it “Techwrix.” You can also choose the location where the project will be saved, but you can leave the default location as is.
Ensure that the “.NET Framework” version is set to 4.7.2, as this is the version we selected in the previous step. Once you’re satisfied with the settings, click “Create” to generate the new project.
Step 3: Explore the Project Structure
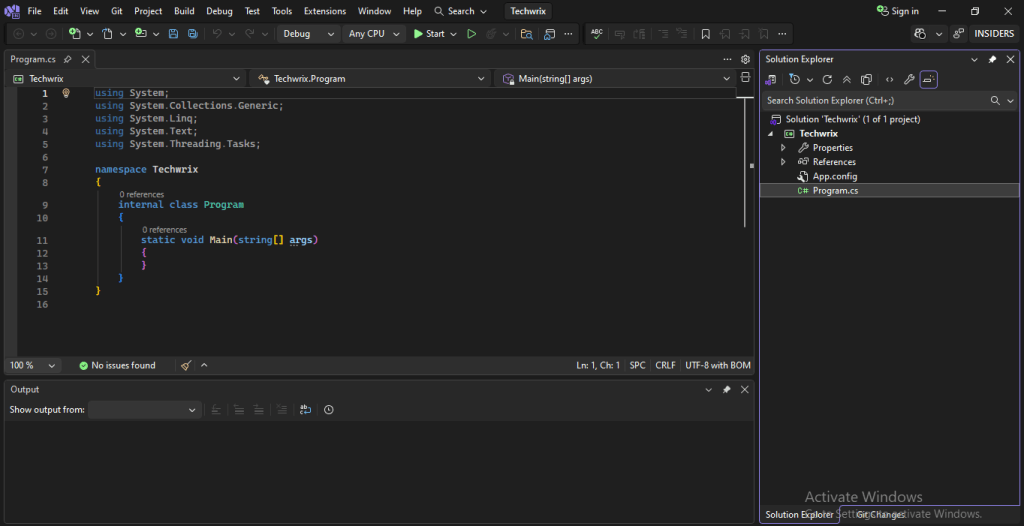
After creating the new project, you’ll see the Solution Explorer, which is the project navigation pane in Visual Studio 2026. Here, you can see the various files and folders that make up your console application project.
The main file you’ll be working with is the “Program.cs” file, which contains the entry point of your application, the `Main()` method. This is where you’ll write your C# code to implement the desired functionality.
Step 4: Write Some Code
In the “Program.cs” file, you’ll see the default code that Visual Studio 2026 has generated for a new console application. Let’s modify this code to print a simple message to the console.
Replace the existing code with the following:
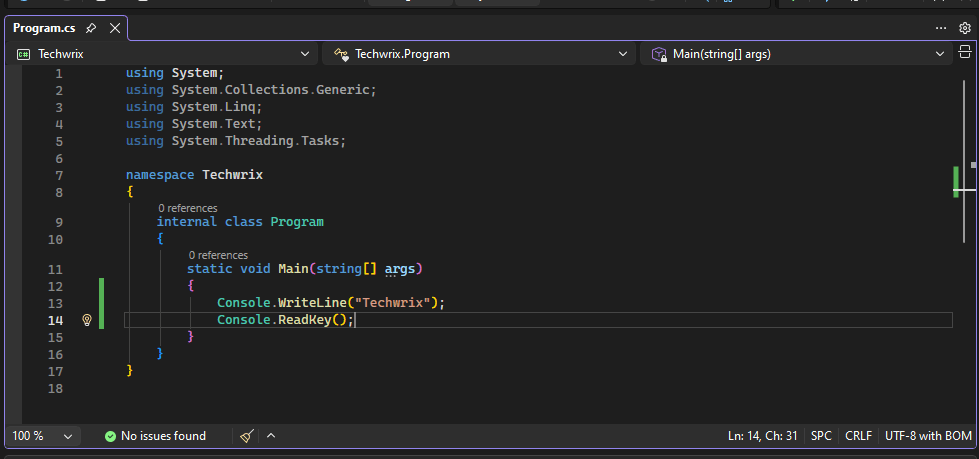
In this code, we’re using the `Console.WriteLine()` method to output the text “Techwrix” to the console. The `Console.ReadKey()` method is added to keep the console window open until the user presses a key that allows you to see the output.
Step 5: Build and Run the Application
To build and run your console application, follow these steps:
- Save the code. Click on the “Build” menu and select “Build Solution” to compile your code.
- If the build is successful, you’ll see a “Build succeeded” message in the Output window.
- Next, click on the “Start” button (the green arrow) or press F5 to run your application.
The console window will appear, and you should see the message “Techwrix” displayed.
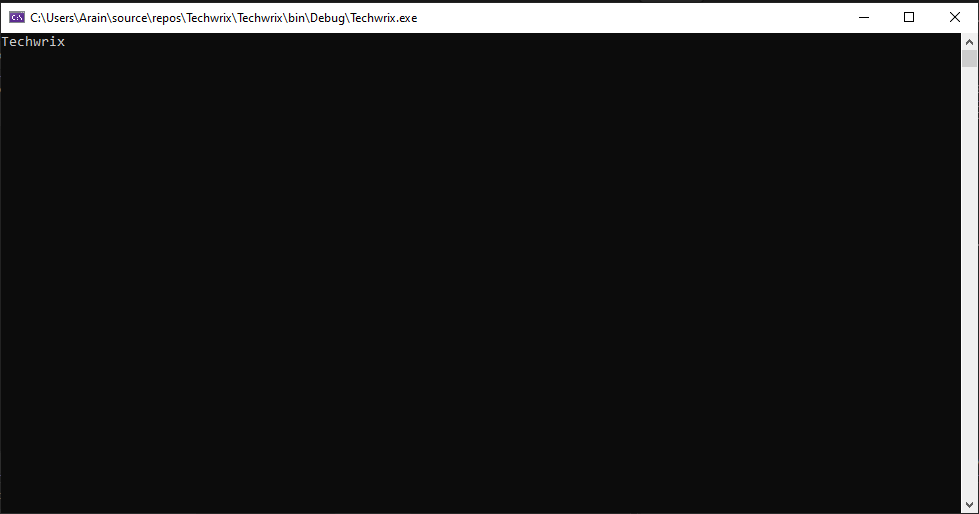
Press any key to close the console window and return to the Visual Studio 2026 IDE. Congratulations! You’ve successfully installed Visual Studio 2026 on your Windows 11 system and created your first C# console application. This is just the beginning of your journey with this powerful development tool.
Read More: How to Install Jupyter Notebook on Windows 11?
Conclusion
In this comprehensive guide, we’ve walked you through the process of installing Visual Studio 2026 on your Windows 11 system and creating a simple C# console application. By leveraging the powerful features and capabilities of this IDE, you can streamline your development workflow, build more high-performing and scalable applications, and collaborate more effectively with your team.
Remember, the journey of a developer is never-ending, and there’s always more to learn. Visit techwrix to continue expanding your skills and knowledge in the world of software development.
